
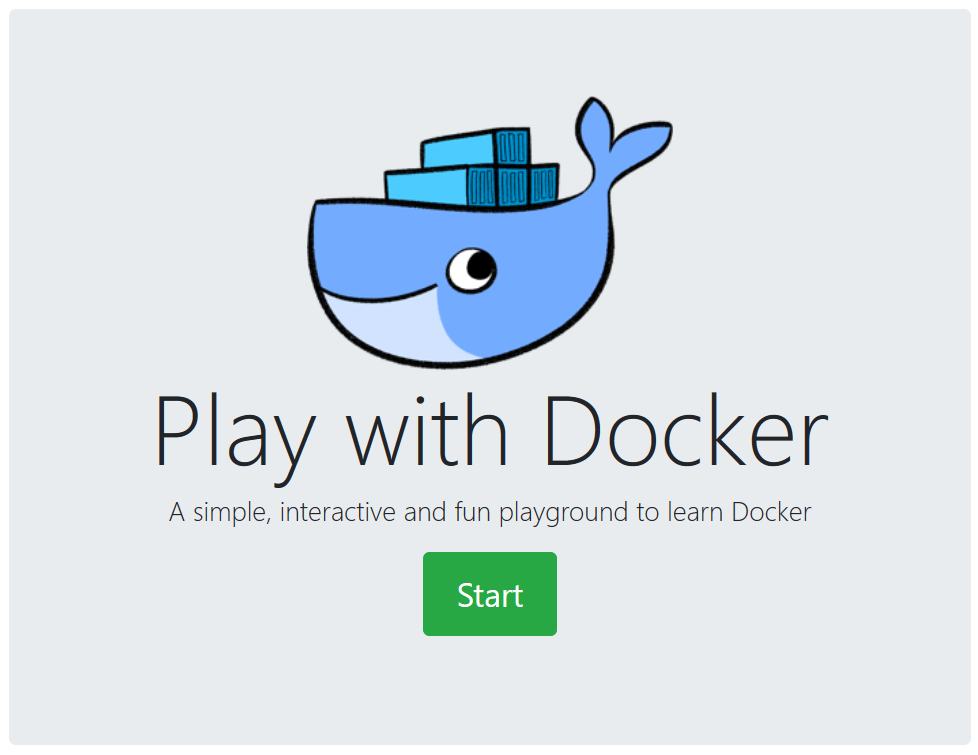
Play with Docker is a project by Marcos Liljedhal and Jonathan Leibiusky and sponsored by Docker. Play with Docker (PWD) allows the user to spin up Docker containers to play with and to prove out concepts. They also provide some training material that may prove useful if you’re new to Docker.
Let’s get started by going to https://labs.play-with-docker.com. Start a new by logging in using your Docker account. If you don’t already have one you’ll need to create a new account to get started.
Play with Docker
You may either choose to Add New Instance or click on the wrench and select 3 Managers and 2 Workers from the modal to get started. We’ll be using Docker Swarm as the container orchestration for OpenFaaS. Kubernetes is another popular choice for container orchestration and works well with OpenFaaS. That’s outside of the scope for this blog post, but perhaps there will be a follow up post using Kubernetes if there’s enough interest.
If you selected Add New Instance to create a single instance you’ll need to manually initialize Docker Swarm by selecting the instance and typing the following command into the terminal window
docker swarm init --advertise-addr eth0
OpenFaaS
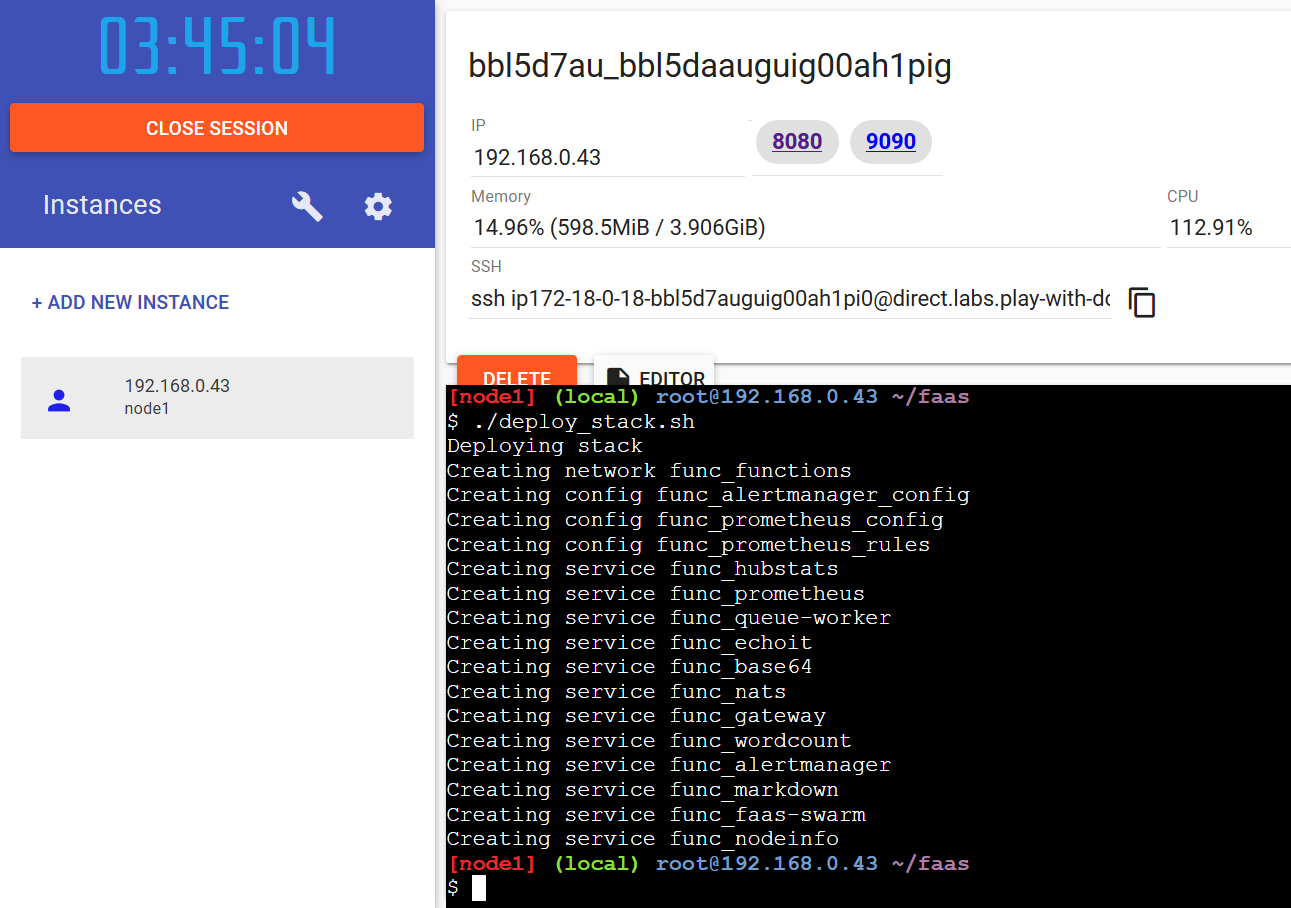
Now we’re going to get and deploy OpenFaaS. OpenFaaS is a framework for building serverless functions with Docker and Kubernetes. It has first class support for metrics, which we’ll explore a little bit. Any process can be packaged as a function enabling you to consume a range of web events without repetitive boiler-plate coding. Clone the faas repository from GitHub and deploy the OpenFaaS stack using the commands below.
git clone https://github.com/openfaas/faas.git

cd faas

./deploy_stack.sh
You should now see two links, 8080 and 9090 near the top-center of the page. These are links to the OpenFaaS Portal and Prometheus instance, respectively. You can read more about these and more at the docs site on http://docs.openfaas.com.
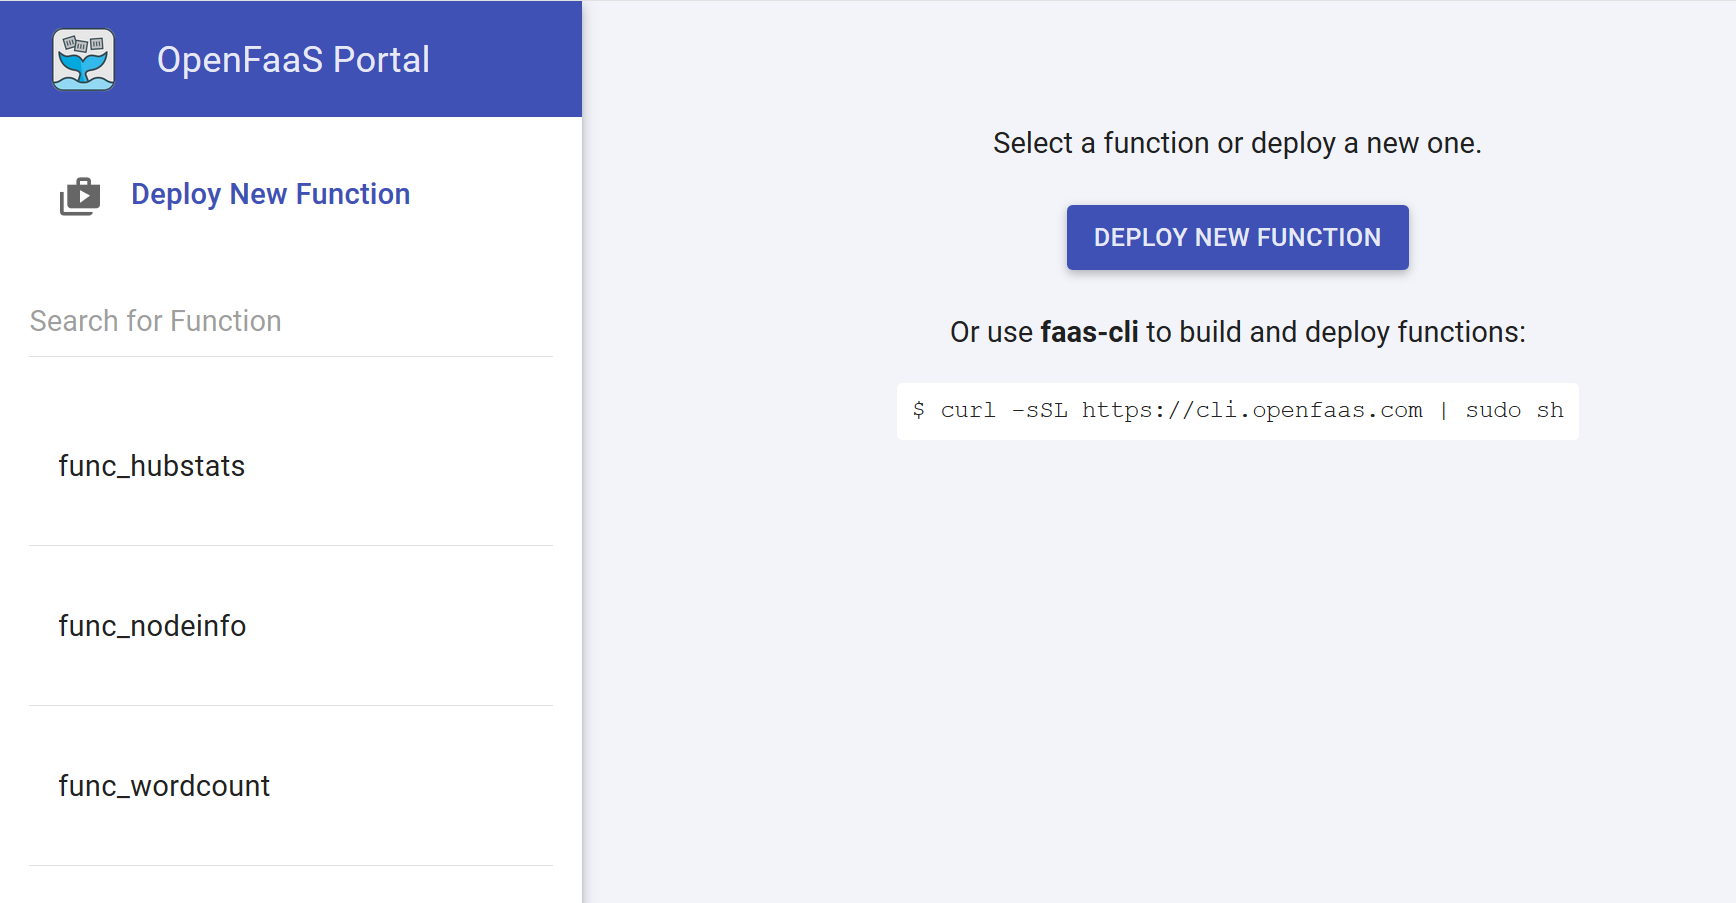
Open the OpenFaaS Portal by clicking on the 8080 link. From here you can invoke any of the functions that are deployed for you by default, deploy new functions from the OpenFaaS store, or manually deploy functions from something like Docker Hub.
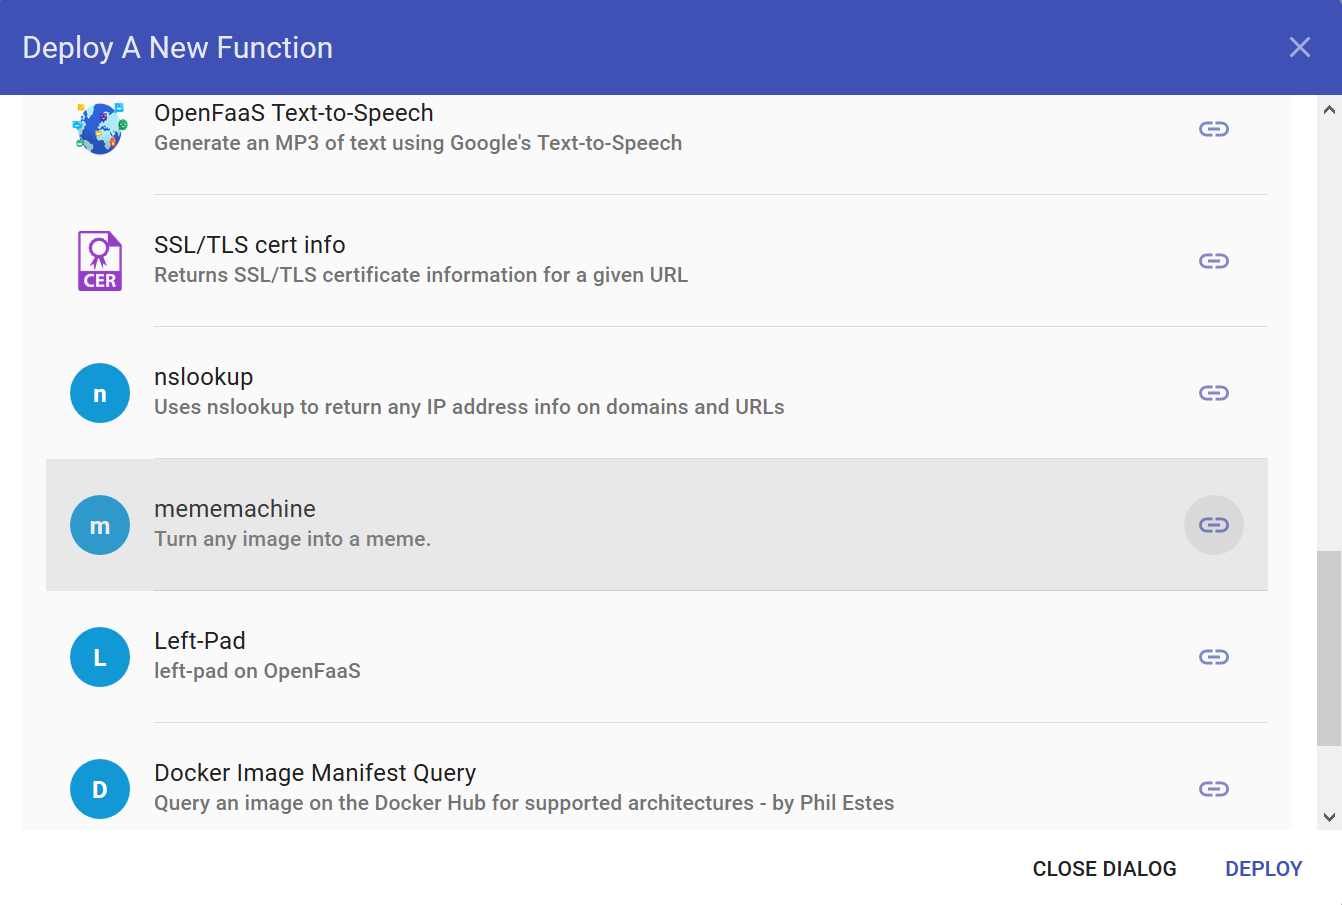
Deploy a new function from the store: mememachine. Mememachine, like it’s name implies allows you to create a meme by supplying a URL to an image and overlays text that you provide to the function. Select mememachine from the modal window and click on deploy.
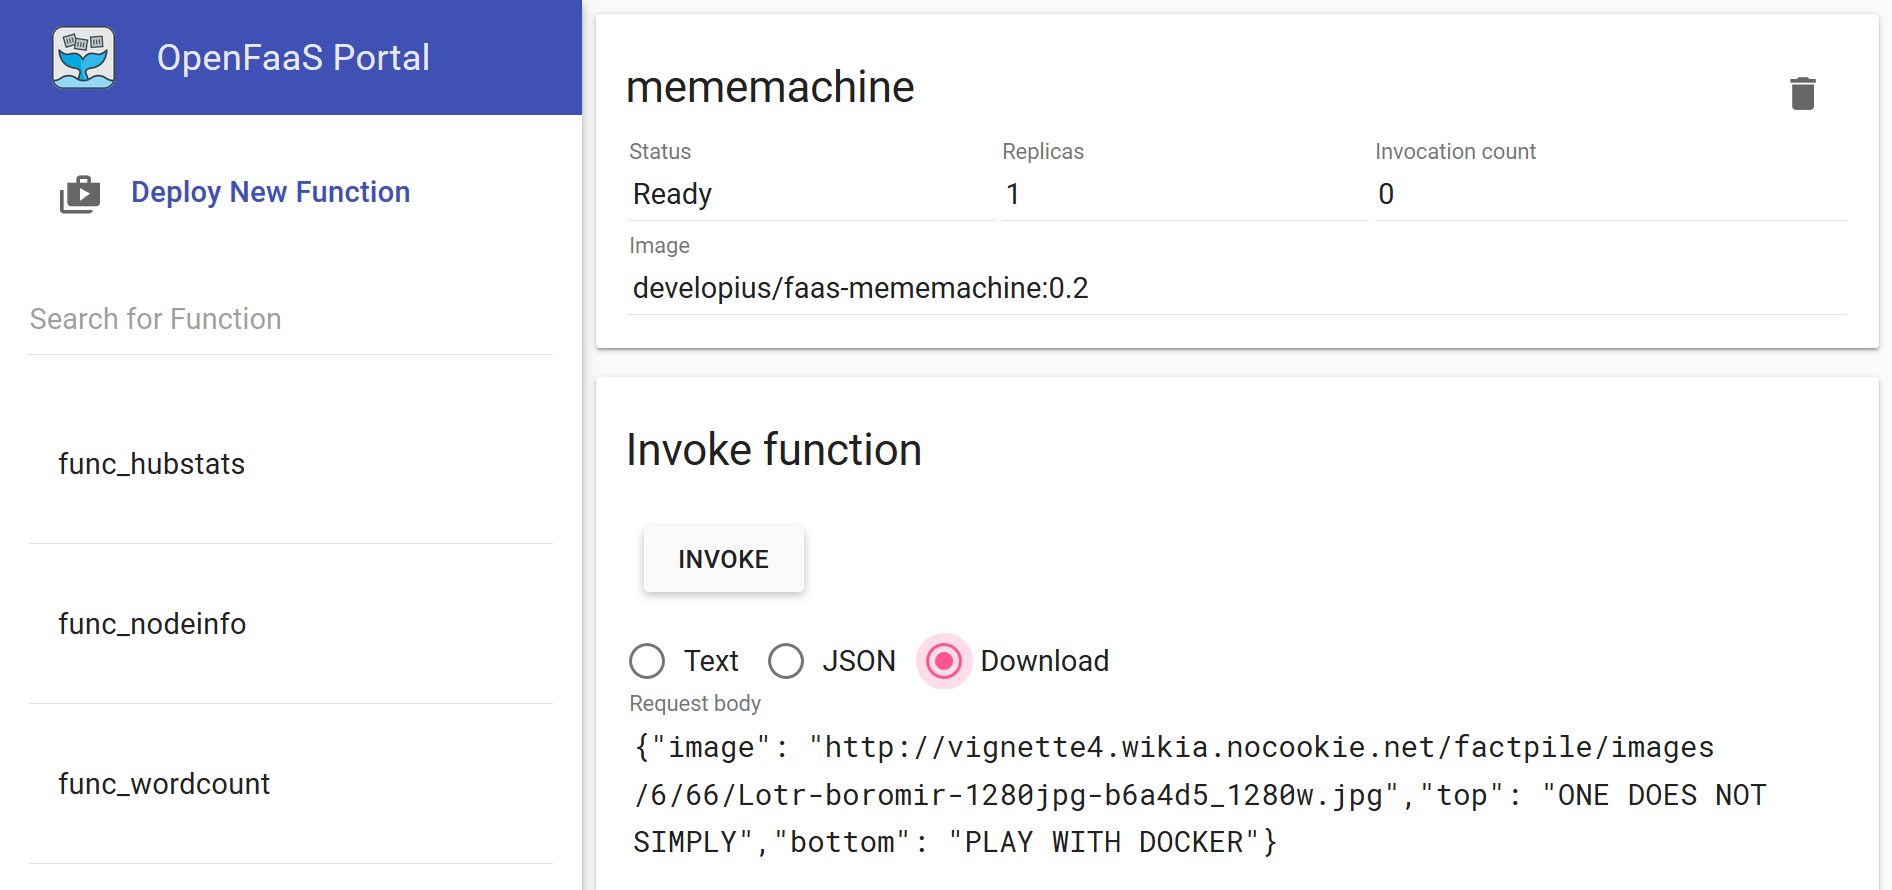
Let’s make sure it works. Select mememachine from the function list. Paste the lines below into the Request body in the OpenFaaS Portal. Select Download so that the response is downloaded when the function is complete, and click on Invoke to run the function.
{
"image": "http://vignette4.wikia.nocookie.net/factpile/images/6/66/Lotr-boromir-1280jpg-b6a4d5_1280w.jpg",
"top": "ONE DOES NOT SIMPLY","bottom": "PLAY WITH DOCKER"
}
In a few seconds you should have a meme generated from the mememachine function running in OpenFaaS. Open up the downloaded image and be amazed!
OpenFaaS CLI
OpenFaaS also has a command line interface or CLI. Switch back to the Docker Playground window for Play with Docker and type the following command to install the OpenFaaS CLI.
curl -sL cli.openfaas.com | sh
In order to create a new function first make a directory to house our functions.
mkdir functions
cd functions
This isn’t completely necessary for this demo, but it will likely prove useful to get into the habit of defining and organizing your folder structure as you continue to explore OpenFaaS and create more functions.
.NET Core Function
Now, create a function to print out some .NET Environment
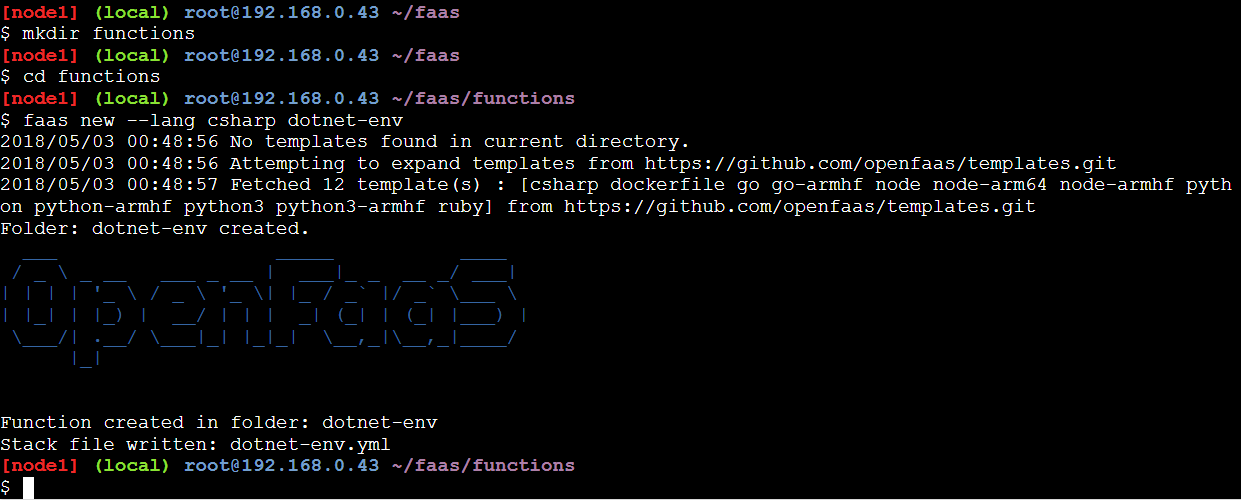
faas-cli new --lang csharp dotnet-env
cd dotnet-env
vi FunctionHandler.cs
We’ll want to spit out some of System.Environment.
using System;
using System.Collections;

namespace Function
{
    public class FunctionHandler
    {
        public void Handle(string input) {
            var nl = Environment.NewLine;

            Console.WriteLine ();
            Console.WriteLine ("Input: {0}", input);
			Console.WriteLine ();

			Console.WriteLine ("-- Environment members --");

            Console.WriteLine ("MachineName: {0}", Environment.MachineName);

			Console.WriteLine ("ProcessorCount: {0}", Environment.ProcessorCount);

			Console.WriteLine ("OSVersion: {0}", Environment.OSVersion.ToString ());

            Console.WriteLine ("StackTrace: '{0}'", Environment.StackTrace);

            Console.WriteLine ("TickCount: {0}", Environment.TickCount);

            Console.WriteLine ("UserDomainName: {0}", Environment.UserDomainName);

            Console.WriteLine ("UserInteractive: {0}", Environment.UserInteractive);

            Console.WriteLine ("UserName: {0}", Environment.UserName);

            Console.WriteLine ("Version: {0}", Environment.Version.ToString ());

            Console.WriteLine ("WorkingSet: {0}", Environment.WorkingSet);

            Console.WriteLine ("GetEnvironmentVariables: ");

            var environmentVariables = Environment.GetEnvironmentVariables ();

            foreach (DictionaryEntry de in environmentVariables) {
                Console.WriteLine ("  {0} = {1}", de.Key, de.Value);
            }

            Console.WriteLine ("GetFolderPath: {0}",
                Environment.GetFolderPath (Environment.SpecialFolder.System));

            var drives = Environment.GetLogicalDrives ();
            Console.WriteLine ("GetLogicalDrives: {0}", string.Join (", ", drives));
        }
    }
}
Once you’ve made the changes to the FunctionHandler.cs file you will need to save and quit vi. To do so hit the Esc key followed by :wq and hit Enter. (you’re welcome)
Now, build the function and deploy to OpenFaaS with the commands below.
faas-cli build -f dotnet-env.yml --parallel=1

faas-cli deploy -f dotnet-env.yml
Grafana
Grafana is an open source project that provides data visualization & monitoring with support for Graphite, InfluxDB, Prometheus, and more. To install Grafana enter the command below.
docker service create -p 3000:3000 -d --name grafana grafana/grafana
You should now see port 3000 is now available as a link in the top-center of the PWD page. Open Grafana by clicking on that link.
Login to Grafana with the default username of admin and password of admin.
Add data source
You’ll need to add a data source to reference the Prometheus instance exposed by OpenFaaS. Provide a name and select the type, Prometheus. Enter the URL, the IP address of the master node, and port for Prometheus (9090 by default).
Name: PWD
Type: Prometheus
URL: 192.168.0.43:9090 (same as prometheus link)
Save & Test the data source.
Import Dashboard
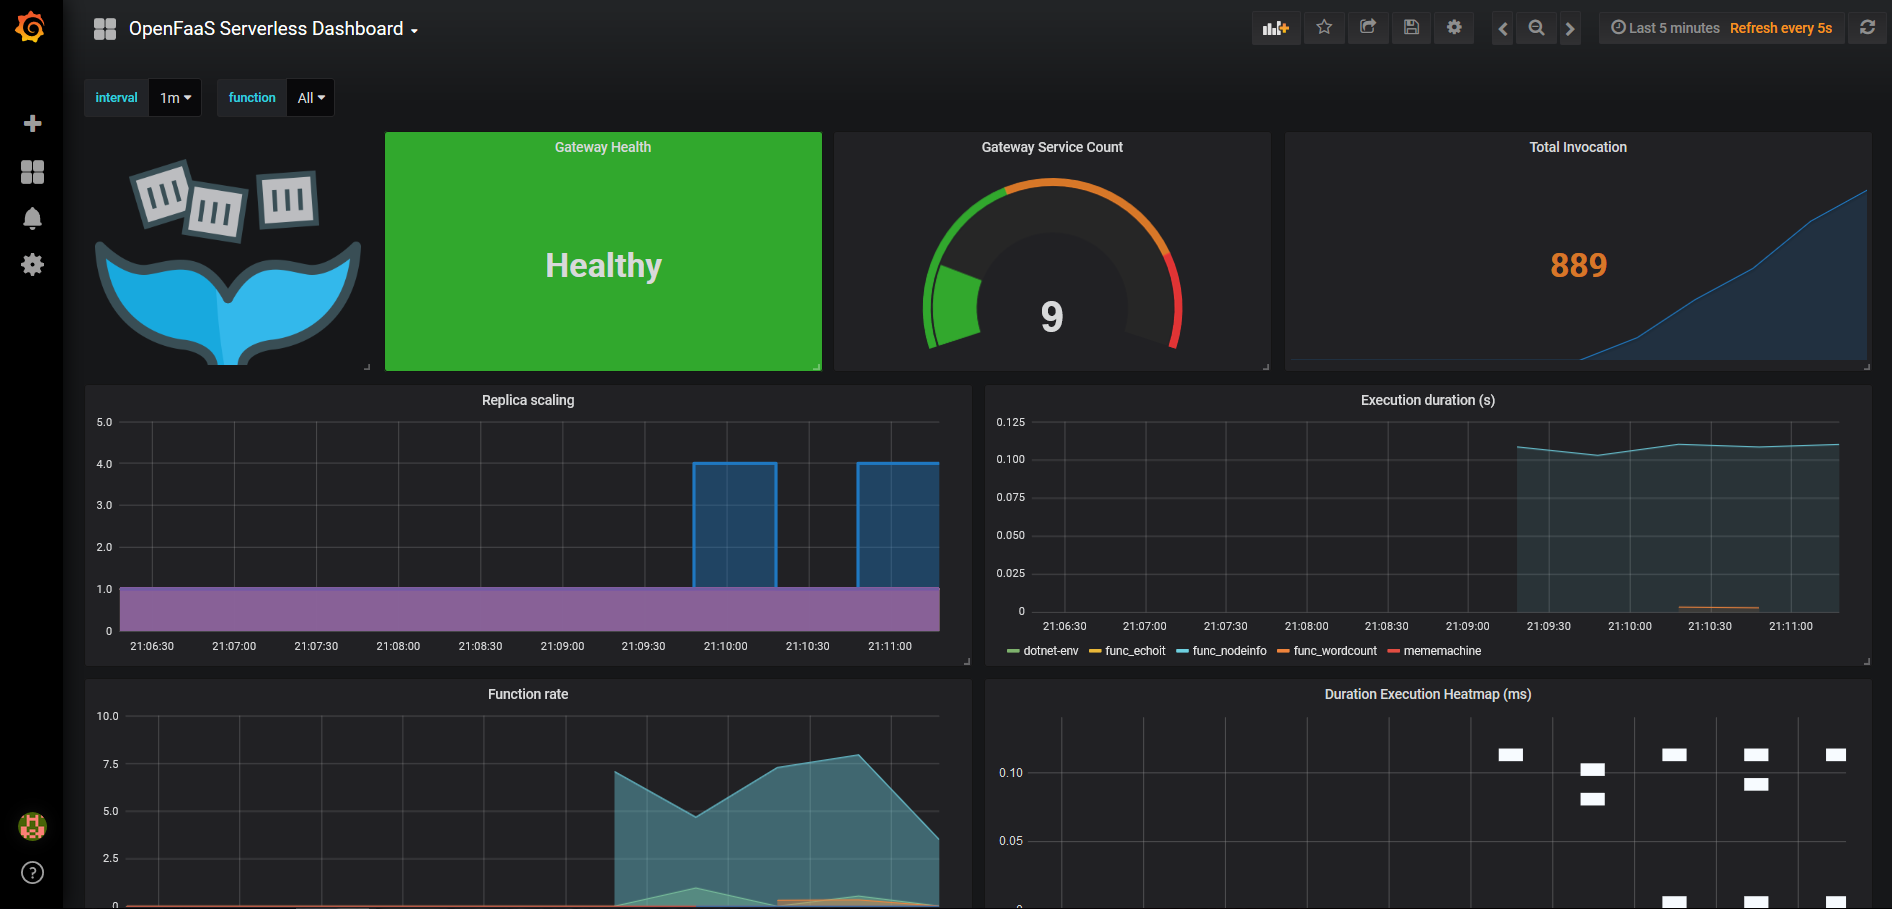
There are a few dashboards available from the community, or you can always create your own. My favorite is a dashboard created by Brian Christner, OpenFaaS Serverless Dashboard.
You can install the dashboard by choosing the + sign, Create => Import. Within the Grafana.com Dashboard textbox enter 3434 (the Id for Brian’s dashboard). From the faas dropdown select “PWD”, or whatever you named your OpenFaaS/Prometheus data source.
– 3434
– PWD
Docker Swarm Visualizer
Another useful tool is the Docker Swarm Visualizer.
docker service create \
--name viz \
--publish 82:8080/tcp \
--constraint node.role==manager \
--mount type=bind,src=/var/run/docker.sock,dst=/var/run/docker.sock \
dockersamples/visualizer
This will allow you to keep and eye on your functions as they scale, as well as give you a visual indicator when they’re available (green dot).

If you started by selecting Add new instance and did not choose 3 Managers and 2 Workers from the wrench menu you likely have only one node. Have no fear, you can always add additional nodes.
Add a few more nodes by clicking on Add new instance. You’ll need to get the join token from your master node. Execute the follow command on your master node to get the token to allow additional nodes to be added to the swarm.
docker swarm join-token worker
Now, select each additional node and execute the following command, substituting your token and IP address from the results above.
docker swarm join --token SWMTKN-1-2b6jsfbtyf1iha5bntiivfa814mbh4lnm9c7ct0oof133hywvl-aqdklqfazno03wkdry9up9tw1 192.168.0.43:2377
You now should have multiple nodes within your swarm which should appear in the Docker Swarm Visualizer. Let’s run a few scripts to execute some functions in quick succession.
Scaling
In order to see the your functions scale, execute the following scripts, one in each node. Open up Docker Swarm Visualizer and Grafana to keep track of the statistics.
while [ true ]; do curl -4 192.168.0.43:8080/function/func_markdown --data "# Hello me it's me again." ; done
while [ true ]; do curl -4 192.168.0.43:8080/function/func_wordcount --data "Hello me, it's me again." ; done
while [ true ]; do curl -4 192.168.0.43:8080/function/func_echoit --data "Hello me, it's me again." ; done
while [ true ]; do curl -4 192.168.0.43:8080/function/func_nodeinfo --data "" ; done
###
The container orchestrations, function management, and API gateway provided by OpenFaaS make it an extremely powerful tool in managing serverless functions. Let me hear from you. I would love to know more about what people are building these days!
Many more resources are available from the OpenFaaS community. Read the docs, join the Slack group, and get involved by contributing on GitHub!
http://openfaas.slack.com
http://docs.openfaas.com
https://www.openfaas.com
https://github.com/openfaas
An International Speaker, Author, and Microsoft MVP, John has been a professional developer since 1999. He has focused primarily on web technologies and currently focuses on C# and .NET Core in Azure. Clean code and professionalism are particularly important to him, as well as mentoring and teaching others what he has learned along the way.